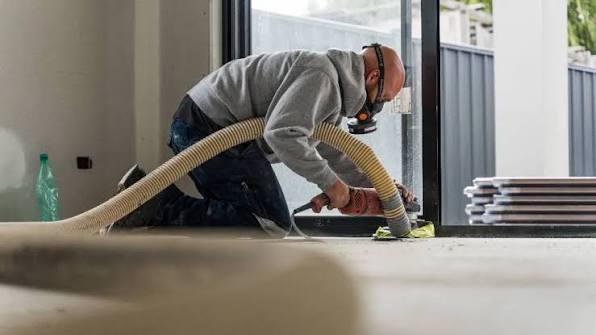
A well-finished concrete floor changes how a garage, patio, workshop, or laundry performs day after day. Dust drops and stains wipe away faster, and light reflects more evenly across the room. Good results do not come from the sealer alone. They start with surface testing, controlled grinding, careful cleaning, and patient curing. Each step affects bond strength, sheen, texture, and long-term wear.
Plan the Floor
Before anyone starts to grind and seal a concrete floor, the slab needs a close visual and moisture check. Look for cracks, oil, paint, adhesive, soft patches, and hollow spots. These faults can change how diamonds are cut and how sealant bonds. Mark repairs, note drainage points, measure the room, and choose the final sheen before equipment arrives.
Gather the Right Gear
A sound home setup includes a floor grinder, diamond tooling, a dust extractor, an edge grinder, a scraper, a crack filler, and a compatible sealer. Personal protective equipment is essential. Use sealed eye protection, hearing guards, gloves, firm footwear, and a respirator rated for fine silica dust. Wet grinding reduces airborne particles, but slurry must be captured, contained, and disposed of in accordance with local rules.
Prepare the Room
Clear the space completely, including shelving near the work zone. Sweep grit, scrape raised residue, and treat oil with a concrete-safe degreaser. Cover doors, vents, and stored items with plastic sheeting. Clean cracks before filling them, then allow repair material to cure fully. A clean room lets the grinder track evenly and limits dust movement through nearby living areas.
Start With Coarse Grinding
Begin with a coarse diamond selected for the slab condition, coating thickness, and desired exposure. Guide the machine slowly, using overlapping passes and steady body pressure. Fast movement leaves chatter, ridges, and dull strips. Work in one direction, then cross the surface at a right angle. Vacuum between passes so scratches, low spots, and remaining coating stay visible.
Refine the Surface
Move through finer diamonds only after the earlier scratch pattern looks even. Each grit should remove the marks from the previous pass, not create a new problem. Stop once the floor reaches the planned texture and stone exposure. Too much grinding can open soft aggregate or reveal patchy areas. Use an edge tool carefully so borders match the main surface.
Clean Before Sealing
Sealer needs a dry, dust-free base to form a stable film or penetrating bond. Vacuum slowly with high-efficiency filtration, then wipe corners, joints, and edges. If water was used, allow full drying before coating. Trapped moisture can cause whitening, peeling, or weak adhesion. A taped plastic sheet test helps show vapour movement before sealant is applied.
Choose a Sealer
Select the sealer according to location, traffic, ventilation, and slip risk. Water-based products suit many indoor areas because odour is lower and cleanup is simpler. Solvent-based coatings can enrich colour, though airflow demands are higher. Matte finishes hide small scuffs better. Gloss reflects more light. Wet zones, ramps, and exterior paths may need a traction additive.
Apply Thin Coats
Read the label before mixing, rolling, or spraying. Coverage rates, recoat windows, and tool choices vary by product chemistry. Apply thin coats from the far corner back to the exit. Heavy layers can bubble, streak, or cure with soft spots. Keep a wet edge to reduce lap marks. Many floors need two coats, with screening only when the maker allows it.
Let It Cure
Dry-to-touch does not mean ready for normal use. Cure time controls hardness, chemical resistance, and abrasion performance. Keep vehicles, rugs, storage tubs, and heavy tools off the surface until the stated period has passed. Early pressure can imprint a fresh coating or trap vapour. Gentle airflow helps curing, but dusty drafts can settle grit into the finish.
Avoid Common Errors
Most failures trace back to rushed preparation. Poor degreasing, uneven grinding, thick sealer, and ignored moisture all shorten service life. Test patches help confirm colour, gloss, and absorption before the full floor is coated. Use strong side lighting while working because shadows can hide missed strips. For cracked slabs or large rooms, skilled help may save time and money.
Conclusion
Grinding and sealing concrete at home can produce a clean, practical surface when each stage is handled with care. The strongest finishes come from accurate inspection, proper repairs, steady grinding, thorough dust removal, suitable sealer selection, and full cure time. A sealed floor can resist staining, reduce powdery residue, and improve daily cleaning. Treat preparation and coating as one connected process, because neither can compensate for the other.